How to Switch OS from Windows to Linux in 2026: A Developer's Guide

Somewhere between your third Windows Update forcing a restart mid-work and realising your RAM is half-occupied before you’ve even opened a browser, a thought crosses your mind: there has to be a better way.
There is. It’s called Linux - and for developers, it might just be the best operating system decision you’ll ever make.
But before we get into the how, let’s be very clear about something important.
The Point of No Return
Switching from Windows to Linux isn’t like reinstalling Windows. It’s not a factory reset that hands you back the same familiar environment, just slightly cleaner. It’s more like moving to a new city - your skills and knowledge come with you, but your muscle memory, your shortcuts, your comfortable routines? Those stay behind.
Here’s what that actually looks like in practice:
-
Your Windows configs don’t transfer: The tweaks you made to your taskbar, your auto-start apps, your keyboard shortcuts, your terminal profiles - none of that moves with you. You’ll rebuild them from scratch. And honestly? You’ll build them better.
-
Some of your apps won’t be there: Microsoft Office, Adobe Photoshop, some games - these are Windows-native and don’t run on Linux (or run poorly through workarounds). We’ll cover this in detail later, but go in with your eyes open.
-
Your workflow will change: Things you did one way on Windows will have a different way on Linux. File management, software installation, system configuration - all different. Not worse. Just different. And in most cases, better once you’ve adjusted.
-
There’s a learning curve: That’s not a problem - that’s the point. Every developer who made this switch went through it. Almost none of them went back.
This guide won’t sugarcoat the trade-offs. But it will give you everything you need to make the switch confidently, set up a solid developer environment, and actually understand what you’re doing - not just copy-paste commands and hope for the best.
Let’s get into it.
Why Bother? The Developer Case for Linux
You could just stay on Windows. It works. Most things run on it. So why do so many developers make the switch?
Performance You Can Actually Feel
Windows carries a lot of baggage. Background services, telemetry processes, antivirus scans, update managers - all of it sitting in memory, chewing through CPU cycles before you’ve written a single line of code.
Linux is lean by design. A fresh Ubuntu install idles at around 500MB–700MB of RAM. A fresh Windows 11 install? Closer to 2-3GB before you’ve opened anything. On the same hardware, Linux will feel noticeably faster - compile times are quicker, the file system is more efficient, and your machine isn’t fighting itself just to run your tools.
You Own the System
On Windows, Microsoft makes a lot of decisions for you. When updates happen. What telemetry gets collected. What apps come pre-installed. What the UI looks like and how much of it you can actually change.
On Linux, you are the authority. Updates happen when you say so. Nothing runs in the background unless you put it there. You can strip the system down to bare essentials or customise it however you like. The OS works for you — not the other way around.
The Terminal is a First-Class Citizen
On Windows, the terminal feels like an afterthought. PowerShell and CMD exist, but the ecosystem wasn’t built around them. Most tutorials, Docker setups, server configs, and developer tooling assume you’re on a Unix-based system - Linux or macOS.
On Linux, the terminal is the heart of the system. Everything is accessible from it. Installing software, managing files, configuring services, writing scripts - all of it is native and natural. You stop fighting the system and start working with it.
The Dev Ecosystem Lives Here
Web servers run Linux. Cloud infrastructure runs Linux. Docker runs natively on Linux. Most open source tooling is written for Linux first. When you develop on Linux, you’re working in an environment that closely mirrors where your code will actually run in production. That matters more than most beginners realise.
The Community is Unmatched
Stuck on an error? There’s a Stack Overflow thread, an Arch Wiki page, a Reddit post, or a GitHub issue that covers it. Linux has been community-driven for over 30 years. The knowledge base is enormous, and the people in it are (usually) genuinely helpful.
What Even Is Linux?
Here’s where a lot of beginners get confused, so let’s clear it up properly.
Linux is not an operating system. Technically, Linux is a kernel - the core layer of software that sits between your hardware and everything else running on your computer. It handles memory, CPU scheduling, hardware communication, and other low-level tasks.
Think of the kernel like the engine of a car. On its own, it doesn’t do much - you need a steering wheel, seats, a dashboard, and a body around it before it’s a car you can actually drive. The full operating system - the desktop environment, the package manager, the default apps, the user interface - is built around the Linux kernel.
That’s where distributions (or distros) come in.
What’s a Distro?
A Linux distribution is a complete operating system built on top of the Linux kernel. Different organisations and groups of developers have taken the kernel and assembled it with different software, package managers, desktop environments, and design philosophies to create different experiences.
Here’s a look at the most notable ones:
| Distro | Package Manager | Stability | Ease of Use | Best For |
|---|---|---|---|---|
| Ubuntu | apt |
High (LTS) | ⭐⭐⭐⭐⭐ | Beginners, developers, general use |
| Linux Mint | apt |
High | ⭐⭐⭐⭐⭐ | Windows switchers, very familiar UI |
| Fedora | dnf |
Medium | ⭐⭐⭐⭐ | Developers who want cutting-edge packages |
| Pop!_OS | apt |
High | ⭐⭐⭐⭐ | Developers, excellent hardware support |
| Kali Linux | apt |
Medium | ⭐⭐⭐ | Cybersecurity professionals |
| Debian | apt |
Very High | ⭐⭐⭐ | Stability-first users, servers |
| openSUSE | zypper |
High | ⭐⭐⭐ | Enterprise/professional use |
| Arch Linux | pacman |
Varies | ⭐⭐ | Advanced users who want full control |
This isn’t an exhaustive list. There are hundreds of distros, but it gives you a picture of the landscape.
A Note on Desktop Environments
Within each distro, you also get a choice of desktop environment - the visual layer that gives you a taskbar, file manager, app launcher, and window management. Common ones include:
- GNOME - modern, clean, used by Ubuntu by default
- KDE Plasma - high customization, Windows-like feel
- XFCE - lightweight, great for older hardware
- Cinnamon - used by Linux Mint, very Windows-like
The distro and the desktop environment are separate things - you can install KDE on Ubuntu, for example. But for now, the defaults are fine.
Which Distro Should You Use?
If you’re new to Linux and coming from Windows, Ubuntu is the right choice. Here’s why:
- Largest beginner community - Google any Linux problem and add “Ubuntu” to the search, and you’ll almost always find an answer
- Long-Term Support (LTS) releases - Ubuntu’s LTS versions are supported for 5 years, giving you stability and security updates without chasing new releases
- Massive software support - more packages, more tutorials, more compatibility than almost any other distro
- Great out-of-the-box hardware support - works on most modern hardware without chasing drivers
- Both
aptandsnapavailable - two package ecosystems mean more software options
For the rest of this guide, we’ll be using Ubuntu 24.04 LTS (Noble Numbat) - the latest long-term support release as of 2026.
One more piece of advice: don’t distro-hop. It’s tempting to try Fedora one week, Arch the next, and Pop!_OS after that. Resist it. Pick Ubuntu, learn it properly, and switch later if you have a genuine reason to. Distro-hopping is how beginners spend months setting up systems instead of actually learning to use them.
Should You Switch? An Honest Checklist
You’ve read through what Linux is, why it’s worth it, and what the friction points actually look like. Now. Honestly. Are you ready?
Tick every statement that’s true for you:
Check every item that applies to you - your result appears automatically at the bottom.
Choosing Your Installation Method
Before the actual installation, you have a key decision to make: dual boot or full wipe?
This is one of the most important choices in the whole process and it’s worth taking seriously.
Dual Boot vs. Full Wipe: The Trade-offs
| Dual Boot | Full Wipe | |
|---|---|---|
| Windows still available | ✅ Yes - choose at startup | ❌ No - Windows is gone |
| Disk Space | Split between two OS | Full Disk for Linux |
| Commitment Level | Low - easy fallback | High - no going back |
| Setup complexity | Higher - partition management required | Lower - straightfoward |
| Risk during install | Moderate - partition errors can affect both OS | Low - Only Linux is affected |
| Boot experience | Bootloader selection screen on every startup | Clean, single-OS boot |
| Performance | Slightly reduced (shared resources) | Full hardware resources for Linux |
| Best for | Users with Windows-only apps they genuinely need | Developers ready to commit |
Summary of Each Choice
Dual boot keeps Windows available as a safety net. You partition your hard drive, install Linux alongside Windows, and choose which one to boot into at startup. It sounds like the best of both worlds — and for some people it is - but it comes with real downsides. Managing two operating systems on one disk is more complex, partition mistakes during setup can corrupt your Windows installation, and having Windows available as a fallback often means you’ll end up back there whenever something feels hard on Linux. It becomes a crutch.
Full wipe means wiping your entire drive and installing Linux as your only operating system. It’s a cleaner, simpler setup with fewer things that can go wrong. The trade-off is obvious: if you need Windows for something, it’s not there. You’ll need workarounds - virtual machines, Wine, or web-based alternatives. But the absence of a fallback is exactly what forces you to actually learn Linux.
Our Experience
Personally, I started with a dual boot. It felt safer, and for the first few weeks, I booted back into Windows more times than I’d like to admit - usually for something I could’ve solved with a quick Linux alternative if I’d just spent 20 minutes looking.
Eventually I did the full wipe, and I haven’t looked back. Not having a fallback forced me to actually learn the system, and that forced learning is what made it stick. My workflow is faster, my system is cleaner, and the things I thought I needed Windows for turned out to have perfectly good Linux solutions.
That said - your situation is yours. If you genuinely rely on software that has no Linux equivalent (certain design tools, some games, specific enterprise software), a dual boot is a completely valid choice. The important thing is making the decision intentionally, not out of fear.
Our recommendation: full wipe. But we walk you through both below.
Before You Install: Prerequisites
These steps apply to both paths. Do them before you touch anything else.
1. Back Up Your Files
This is non-negotiable. Before modifying your drive in any way, back up everything - documents, photos, projects, browser bookmarks, SSH keys, .env files, anything you care about. Use an external hard drive, a USB, or cloud storage. Do not skip this step.
2. Download Ubuntu 24.04 LTS
Go to the official Ubuntu website and download the ISO: ubuntu.com/download/desktop
Select Ubuntu 24.04.2 LTS. The file is around 5GB. Download it somewhere you can find it easily.
3. Create a Bootable USB
You need a USB drive with at least 8GB of storage. Everything currently on it will be erased, so back it up if needed.
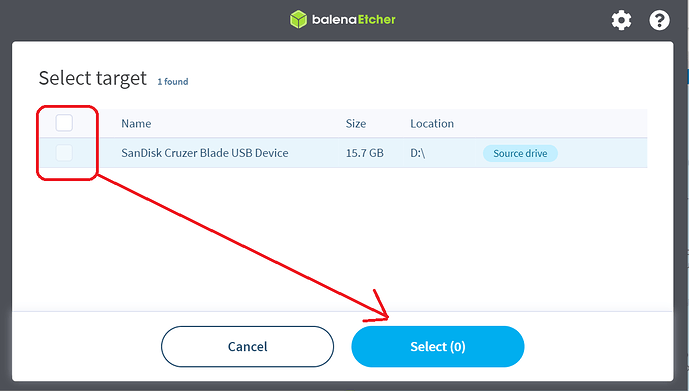
Recommended tool: Balena Etcher - free, cross-platform, and designed for exactly this.
- Download and open Balena Etcher
- Click “Flash from file” and select the Ubuntu ISO you downloaded
- Click “Select target” and choose your USB drive
- Click “Flash!” and wait - usually 5–10 minutes.
4. Boot from the USB
Once your USB is ready:
- Plug it into your computer and restart
- As the machine boots, press the key to enter your boot menu - this varies by manufacturer:
| Manufacturer | Key |
|---|---|
| Dell | F12 |
| HP | F9 or Esc |
| Lenovo | F12 or F10 |
| ASUS | F8 or Esc |
| MSI | F11 |
| Acer | F12 |
| Custom build | Delete or F12 (check your motherboard manual) |
- Select your USB drive from the boot menu
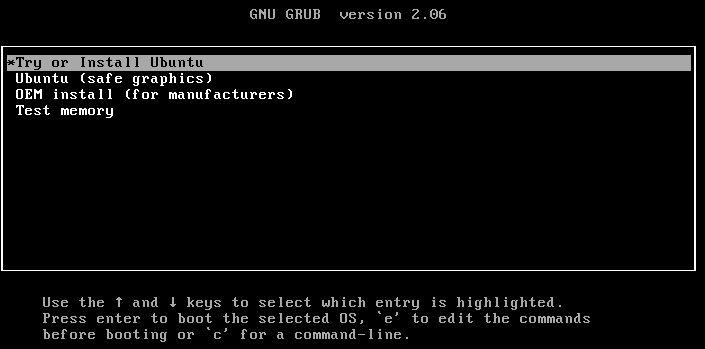
- You’ll see the Ubuntu boot screen - select “Try or Install Ubuntu”.
Now choose your path:
Installation Walkthrough: Dual Boot
Dual booting keeps Windows on your machine and installs Ubuntu alongside it. Your hard drive is split into two separate partitions - one for each operating system.
⚠️ Before you proceed: Disable BitLocker on your Windows drive before attempting a dual boot. BitLocker’s encryption can cause issues when resizing partitions. Go to Settings → Privacy & Security → Device Encryption and turn it off, or search “Manage BitLocker” in the Start menu. Wait for full decryption to complete before moving forward.
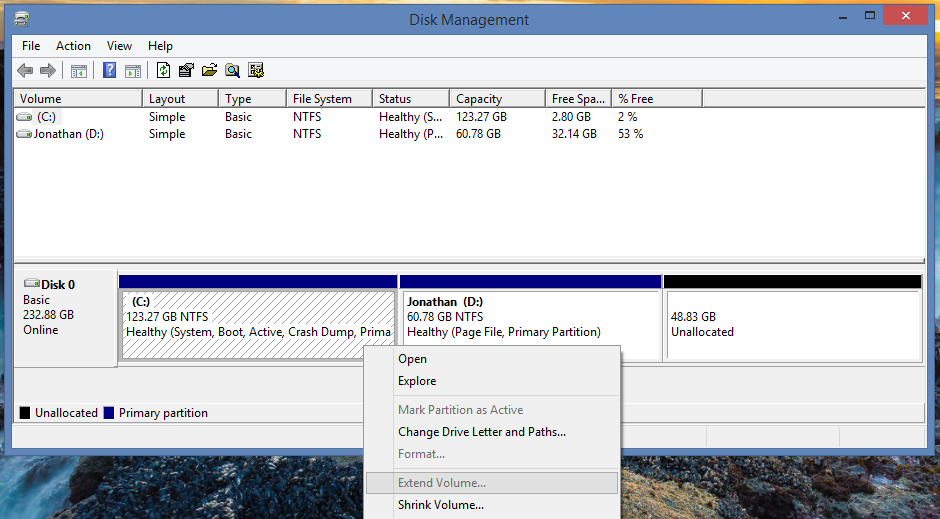
Step 1: Free Up Disk Space in Windows
You need to shrink your Windows partition to create room for Ubuntu. We recommend giving Linux at least 50GB - more if you plan to store large projects.
- Press
Win + Xand open Disk Management - Right-click your main Windows partition (usually
C:) and click Shrink Volume - In the “Enter the amount of space to shrink in MB” field, enter your target amount. For 60GB, enter
61440 - Click Shrink
- You’ll see a new block of Unallocated space appear on your drive - leave it as-is, the Ubuntu installer will handle it.
Step 2: Start the Ubuntu Installer
With your USB plugged in and Ubuntu loaded, double-click “Install Ubuntu” on the live desktop.
Step 3: Language and Keyboard
Select your preferred language and keyboard layout. Click Continue.
Step 4: Updates and Other Software
- Select “Normal installation”
- Check “Download updates while installing Ubuntu”
- Check “Install third-party software for graphics and Wi-Fi hardware”
Click Continue.
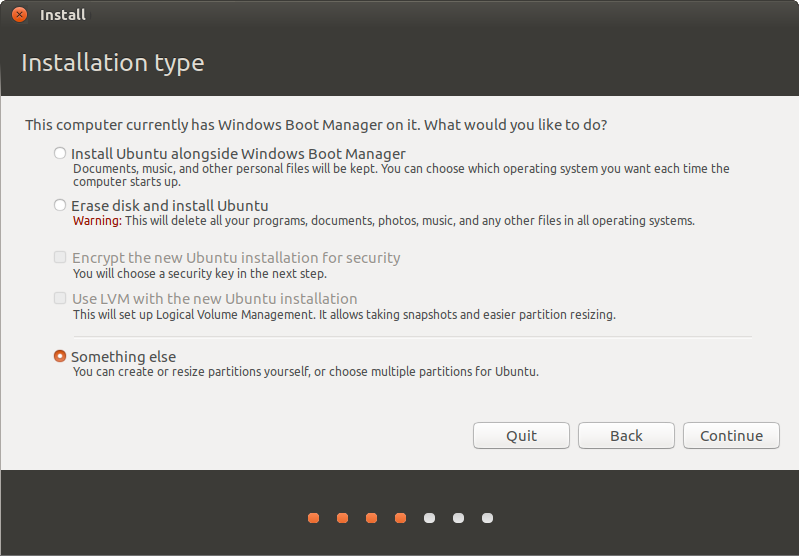
Step 5: Installation Type - The Critical Step
When you reach the “Installation type” screen, look for “Install Ubuntu alongside Windows Boot Manager”. If it appears, select it and Ubuntu’s installer will handle the partitioning automatically using the unallocated space.
If that option doesn’t appear (which can happen with certain partition setups), select “Something else” and set it up manually:
- Select the unallocated block and click
+ - Set Size to your total unallocated space minus 2048MB
- Set Type for the new partition to Primary
- Set Use as to Ext4 journaling file system
- Set Mount point to
/ - Click OK
- Select the remaining unallocated space and click
+again - Set it as swap area (2048MB is sufficient for most systems)
- Click OK, then click Install Now.
Step 6: Timezone and User Account
Set your timezone, then create your account:
- Enter your name and a username (lowercase, no spaces - e.g.
ahmad) - Set a strong password - this is your
sudopassword, so treat it seriously - Enable “Require my password to log in”
Step 7: Install and Reboot
Click Install Now and confirm the partition changes. Installation typically takes 10–20 minutes. Once it’s done, remove the USB when prompted and restart.
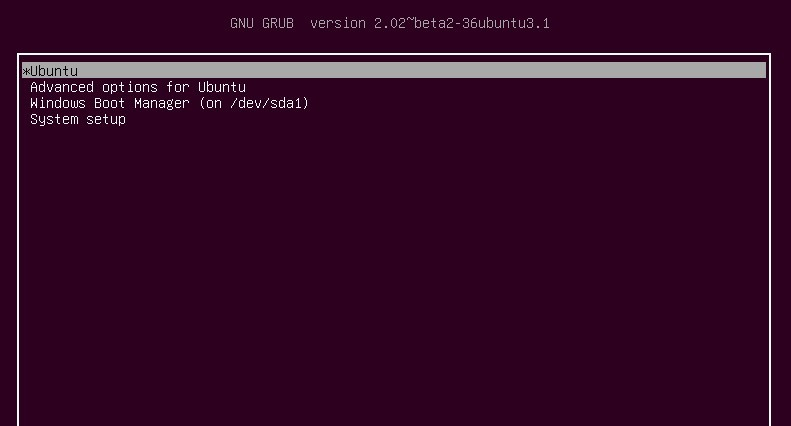
Step 8: The GRUB Bootloader
On startup, you’ll now see the GRUB bootloader - a menu that lets you choose between Ubuntu and Windows at every boot. Use arrow keys to navigate, Enter to select.
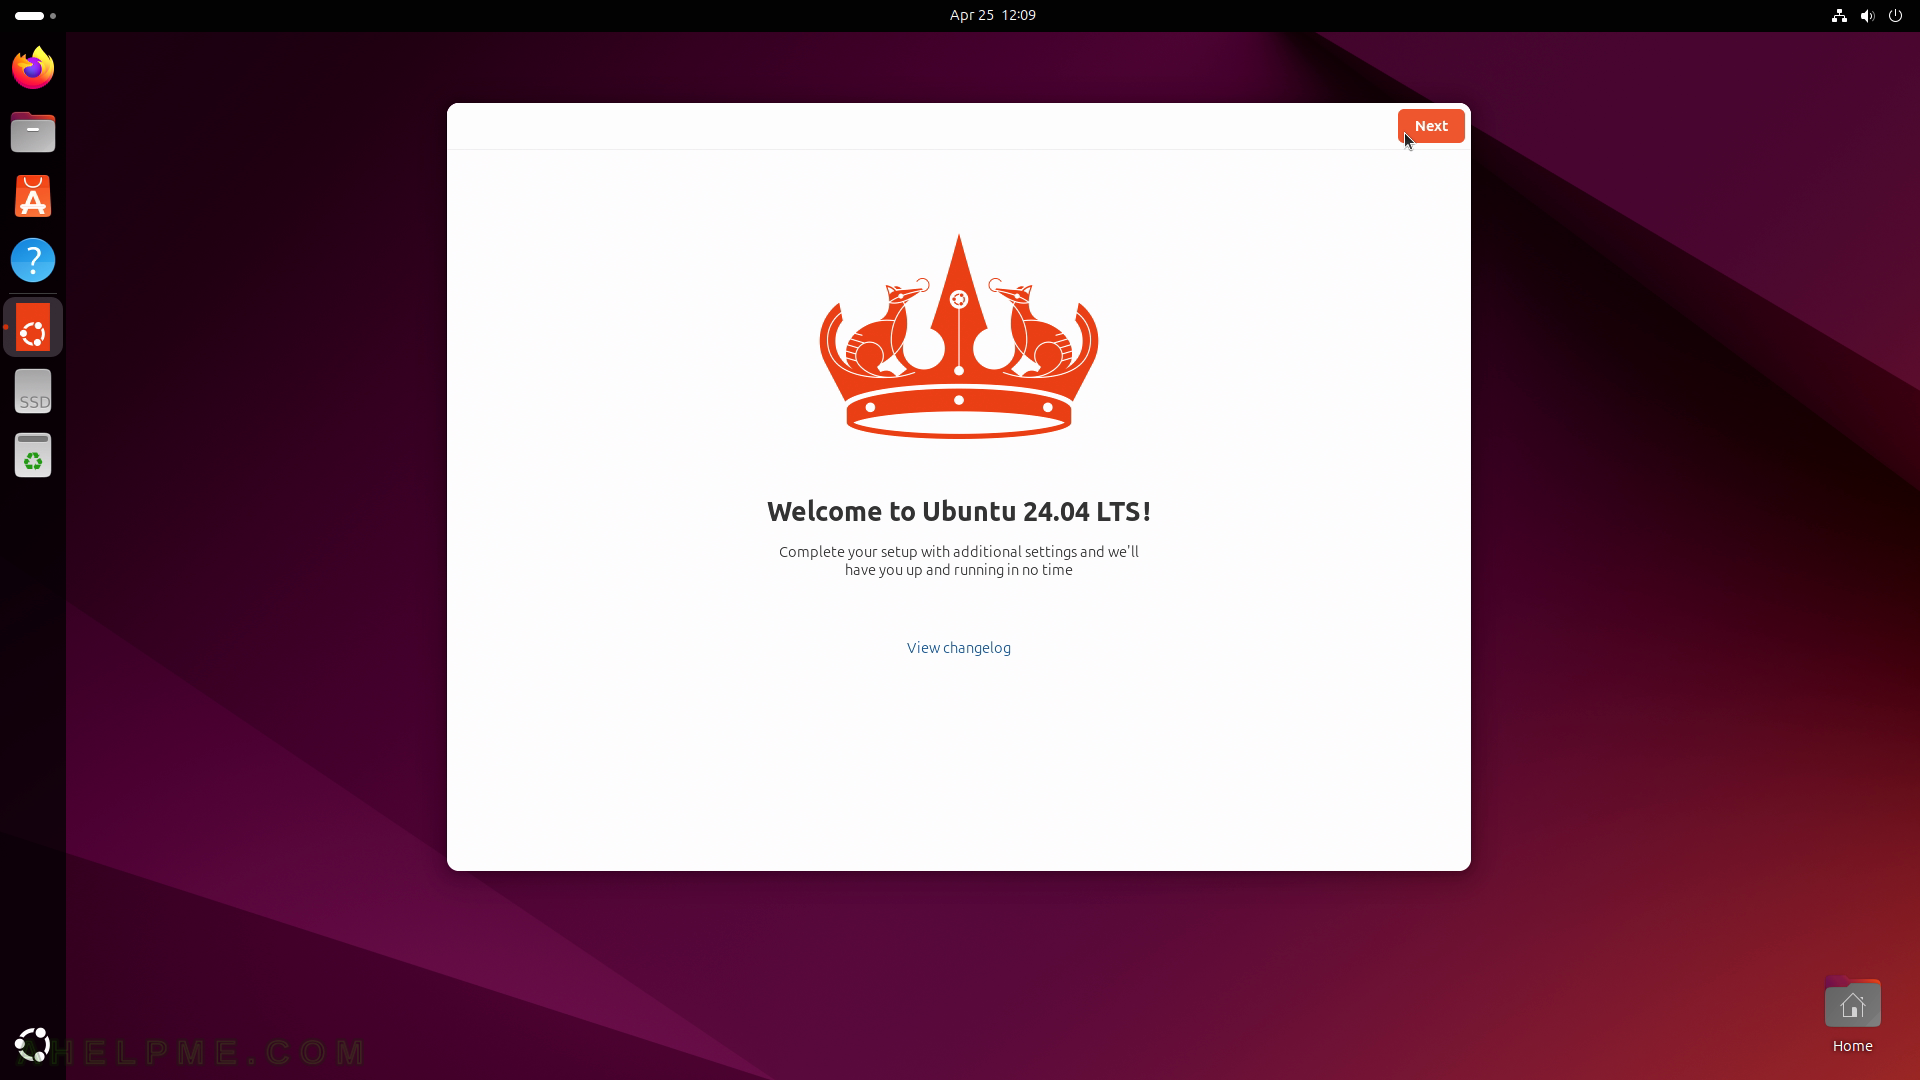
Welcome to Ubuntu. Head to the First things First section below to start setting up.
Installation Walkthrough: Full Wipe
Full wipe removes Windows entirely and installs Ubuntu as your only operating system. This is the cleaner, simpler option and the one we recommend.
⚠️ Final reminder: Everything on your drive is about to be erased. If you haven’t backed up yet, stop and do that now. Once you wipe, there’s no undo.
Step 1: Start the Ubuntu Installer
With your USB plugged in and Ubuntu loaded, double-click “Install Ubuntu” on the live desktop.
Step 2: Language and Keyboard
Select your preferred language and keyboard layout. Click Continue.
Step 3: Updates and Other Software
- Select “Normal installation”
- Check “Download updates while installing Ubuntu”
- Check “Install third-party software for graphics and Wi-Fi hardware” — important for driver support on most machines
Click Continue.
Step 4: Installation Type - Erase and Install
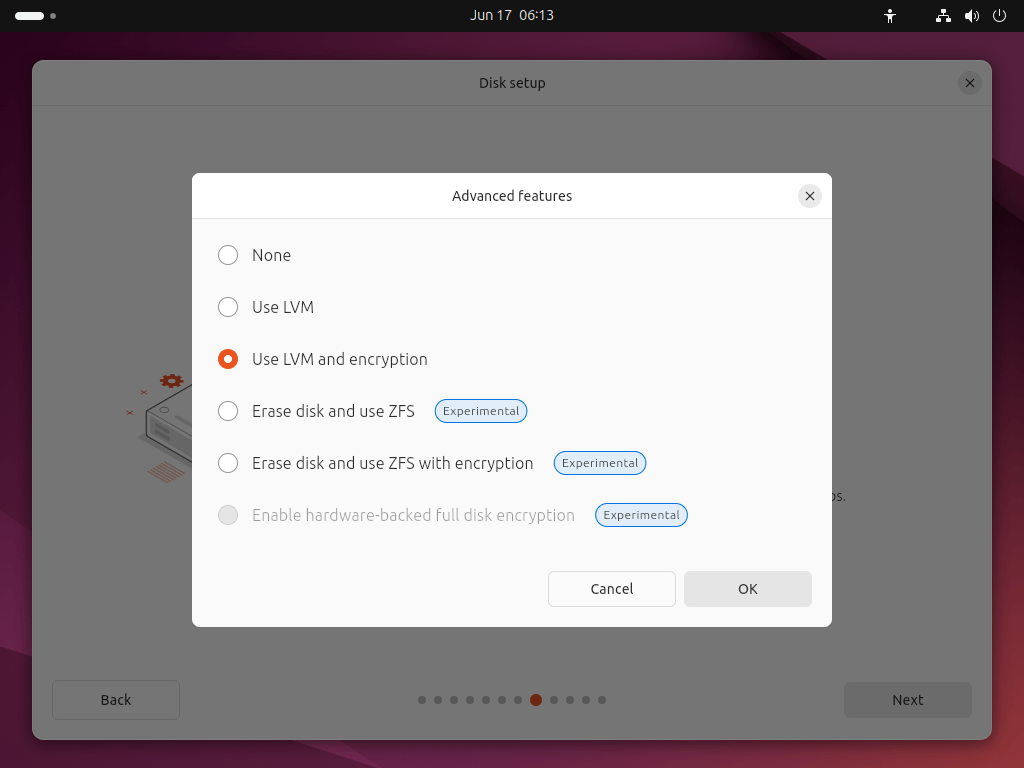
On the “Installation type” screen, select “Erase disk and install Ubuntu”.
At this point you’ll also see an Advanced Features option. If you want full-disk encryption (recommended for developer laptops - adds a password prompt at boot in exchange for encrypting everything on the drive), click it and enable LVM with encryption. Optional, but worth considering.
💡 Quick Note: LVM (Logical Volume Management) encryption is a method of encrypting data on a Linux system. It uses the dm-crypt module, which is a part of the Linux kernel, to encrypt and decrypt data stored on disk. Keep in mind that using LVM encryption will slightly affect system performance and may require additional time for disk I/O operations. However, the added security benefits make it a popular choice for users who need to protect sensitive information on their Linux systems.
Click Install Now and confirm the warning. This is the point of no return - your drive will be wiped and Ubuntu will be installed on the full disk.
Step 5: Timezone and User Account
Set your timezone, then create your account:
- Enter your name and a username (lowercase, no spaces)
- Set a strong password - this becomes your
sudopassword for the entire system - Enable “Require my password to log in”
Click Continue.
Step 6: Install and Reboot
The installation runs typically 10–20 minutes. Once done, remove the USB when prompted and restart.
Step 7: First Boot
No bootloader menu. No Windows prompt. Your machine boots straight into Ubuntu.
First Things First - Setting Up Your Dev Environment
Fresh desktop. Blinking cursor. Now what?
1. Update Everything First
Before installing anything, update your system. Think of this like syncing a new phone after an unboxing - you want to pull in all the patches released since the ISO was built.
Open a terminal (Ctrl + Alt + T) and run:
sudo apt update && sudo apt upgrade -y
apt update refreshes the list of available packages. apt upgrade installs all pending updates. The -y flag skips the “are you sure?” prompts for each package. Let it finish, it might take a few minutes.
2. Install a Better Terminal (Optional but Recommended)
Ubuntu ships with GNOME Terminal, which works. But if you want something more capable that provides split panes, tabs, better customization, then consider:
- Terminator -
sudo apt install terminator -y - Kitty - GPU-accelerated, very fast:
sudo apt install kitty -y - Tilix - excellent split-pane support:
sudo apt install tilix -y
Pick one, try it for a week, stick with it.
3. Install Git
sudo apt install git -y
git config --global user.name "Your Name"
git config --global user.email "your@email.com"
4. Install a Browser
Firefox comes pre-installed. If you prefer Chrome:
wget https://dl.google.com/linux/direct/google-chrome-stable_current_amd64.deb
sudo dpkg -i google-chrome-stable_current_amd64.deb
sudo apt --fix-broken install -y
The --fix-broken install line cleans up any dependency issues the .deb installer leaves behind.
5. Install VS Code
sudo snap install code --classic
Or download the .deb package directly from code.visualstudio.com and install it with:
sudo dpkg -i code_*.deb
sudo apt --fix-broken install -y
6. Install Your Language Runtimes
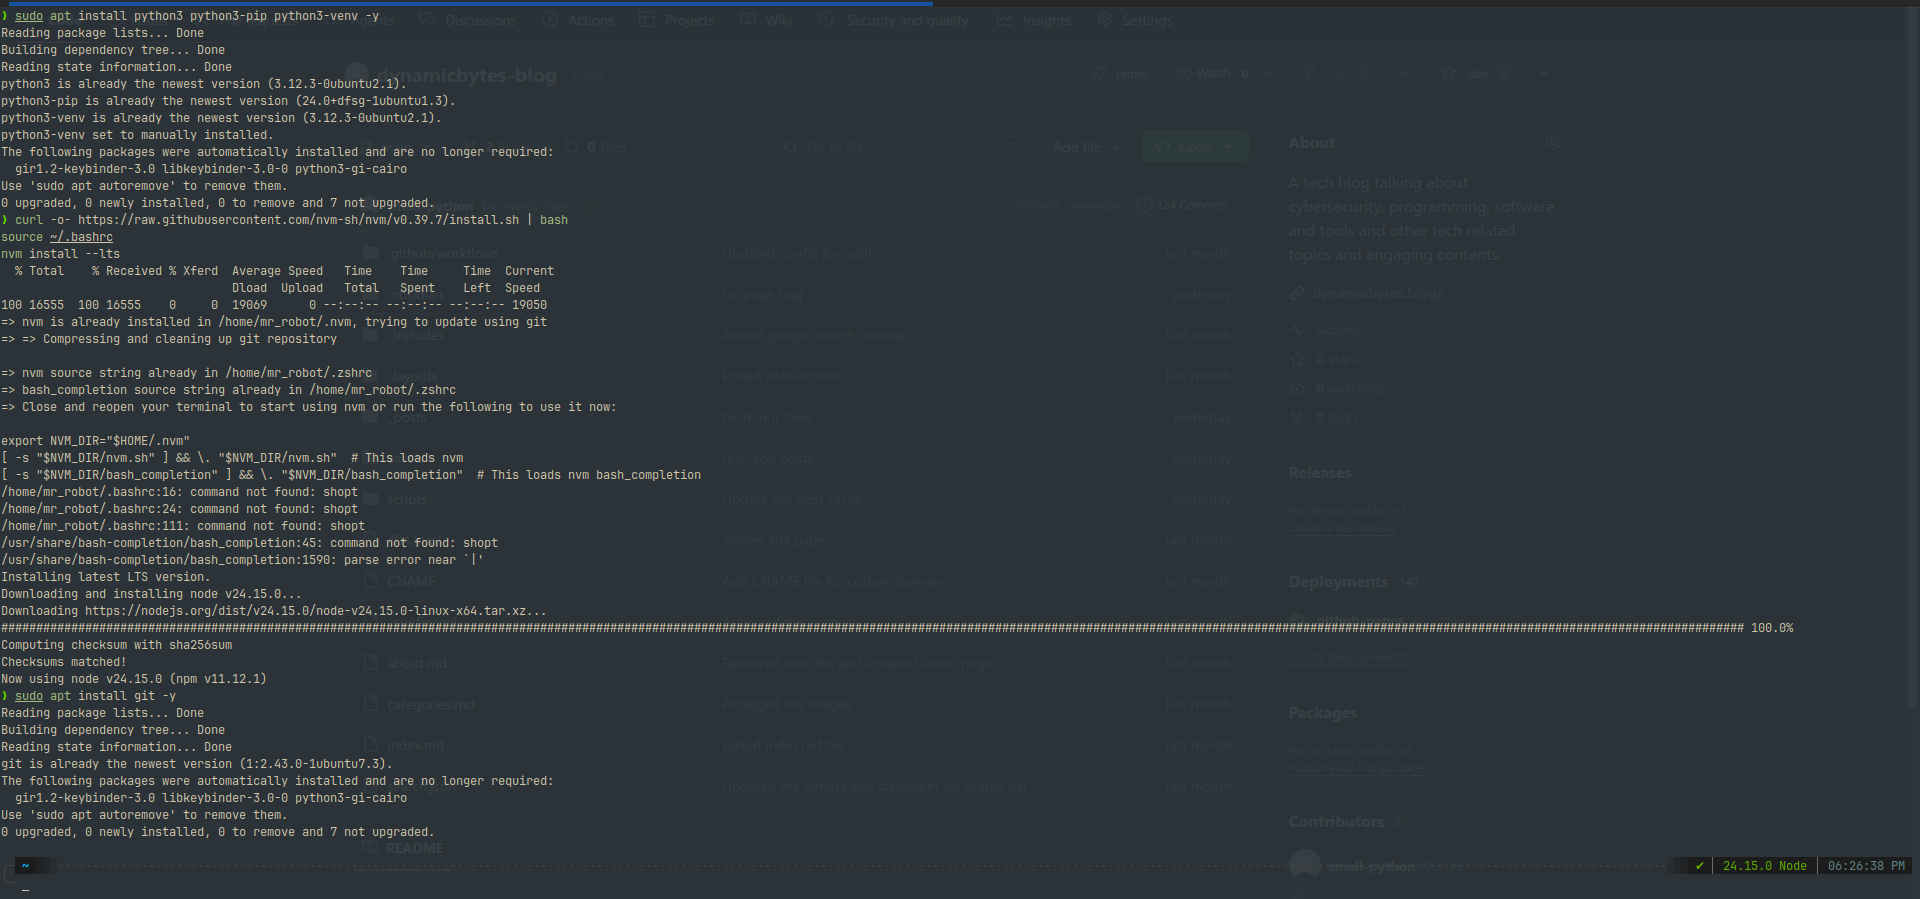
Python 3:
sudo apt install python3 python3-pip python3-venv -y
Node.js via nvm (recommended over apt - gives you version control):
curl -o- https://raw.githubusercontent.com/nvm-sh/nvm/v0.39.7/install.sh | bash
source ~/.bashrc
nvm install --lts
Java:
sudo apt install default-jdk -y
For a more complete walkthrough of setting up your full programming environment from scratch, check out our post: How to Easily Setup a Good Beginner Programming Environment in 2026
7. Configure SSH for GitHub
ssh-keygen -t ed25519 -C "your@email.com"
Press Enter through the prompts (or set a passphrase for extra security). Then print the public key:
cat ~/.ssh/id_ed25519.pub
Copy the output and add it to GitHub under Settings → SSH and GPG keys → New SSH key. From this point, you can clone, push, and pull over SSH without entering your password.
8. Configure Your Shell (Optional but Worth It)
By default, Ubuntu uses Bash. It works, but many developers switch to Zsh with Oh My Zsh for better autocomplete, syntax highlighting, and themes:
sudo apt install zsh -y
sh -c "$(curl -fsSL https://raw.githubusercontent.com/ohmyzsh/ohmyzsh/master/tools/install.sh)"
If you’re happy with Bash, you can also improve it with Starship prompt, which is a fast, cross-shell prompt that gives you git status, active language versions, and more:
curl -sS https://starship.rs/install.sh | sh
Then add eval "$(starship init bash)" to the end of your ~/.bashrc.
Things That Work Differently on Linux
Let’s be honest about the friction points. Most of them have good solutions but you should know what you’re walking into.
1. Microsoft Office
LibreOffice comes pre-installed on Ubuntu and handles most Office formats reasonably well for everyday use. For light to moderate document work such as writing, simple spreadsheets, presentation - it’s fine. For heavy Excel work (complex macros, Power Query, pivot tables with lots of formatting), it falls short.
Alternatives:
| Need | Tool | Notes |
|---|---|---|
| Word processing | LibreOffice Writer | Free, offline, handles .docx |
| Spreadsheets | OnlyOffice | Better Office compatibility than LibreOffice |
| All Office formats | Microsoft 365 (browser) | Works well for most tasks |
| Collaborative docs | Google Docs/Sheets | Excellent if you’re in the Google ecosystem |
2. Adobe Suite
Photoshop, Illustrator, Premiere - none of these run natively on Linux. Adobe has no Linux support and there’s no indication that’s changing.
Alternatives:
| Adobe Tool | Linux Alternative | Notes |
|---|---|---|
| Photoshop | GIMP | Powerful, free, steeper learning curve |
| Illustrator | Inkscape | Excellent SVG/vector editor |
| Premiere | Kdenlive | Free, full-featured video editor |
| Premiere/Resolve | DaVinci Resolve | Has a native Linux version - excellent quality |
| XD / Figma | Figma | Browser-based, works perfectly on Linux |
3. Gaming on Linux
Steam on Linux has improved significantly thanks to Proton - a compatibility layer that lets many Windows-native games run on Linux without modification. The situation in 2026 is much better than it was a few years ago.
Before assuming a game won’t run, check ProtonDB which serves as a community database of game compatibility reports. You’ll be surprised how much works.
The main blocker for multiplayer titles is anti-cheat software (Easy Anti-Cheat, BattlEye). Some games with these have added Linux support; others haven’t. Again, ProtonDB will tell you the current state for any specific title.
4. Running Windows Apps: Wine and Virtual Machines
If you genuinely need a Windows-only application, two options exist:
1. Wine is a compatibility layer that lets some Windows .exe files run directly on Linux. It’s not a virtual machine - it translates Windows system calls into Linux ones. Some apps work well; others don’t. Install it and try before giving up:
sudo apt install wine -y
2. Virtual Machines let you run a full Windows environment inside a window on your Linux desktop. This is the nuclear option where you get real Windows, but it needs significant RAM and storage. GNOME Boxes is the easiest way to set this up:
sudo apt install gnome-boxes -y
You’ll need a Windows ISO and a valid licence to run it legally.
5. Software Installation is Different (and Better)
On Windows, you download a .exe and click through an installer wizard. On Linux, most software is installed through a package manager which is generally a centralised system that handles installation, updates, and dependency management automatically.
sudo apt install [package-name]     # Install a package
sudo apt remove [package-name]      # Remove a package
sudo apt purge [package-name]       # Purge a package and its data along with it
sudo apt update                     # Refresh available package lists
sudo apt upgrade                    # Update all installed packages
sudo apt autoremove                 # Clean up unused dependencies
Think of apt like an app store, but for the terminal which makes it faster, no ads, and it manages everything for you.
Some software comes as a Snap or Flatpak - alternative packaging formats for software not in the official repos:
sudo snap install [package-name]               # Install a Snap
flatpak install flathub [package-name]         # Install a Flatpak (install flatpak first)
Common First-Week Mistakes
Every Linux switcher makes these. You might too which is completely fine. The goal is to recognize them early rather than spend hours debugging something that didn’t need to break in the first place.
1. sudo-ing Everything
sudo grants a command root (administrator) privileges. It’s powerful, and when something fails, the temptation is to just throw sudo in front of it and try again. Don’t.
Running commands as root when you don’t need to can overwrite file permissions, install things in system directories that should be user-local, and create problems that are genuinely annoying to untangle. If a command fails, read the error output first. Most of the time you don’t need sudo - you just need to fix a path, install a missing package, or maybe just adjust a permission.
Rule of thumb: only use
sudowhen the error explicitly says “permission denied” or the documentation tells you to.
2. Not Reading the Error Message
This one accounts for more lost hours than any actual bug.
When something fails, the terminal tells you what failed and usually how to fix it. The error message is not decoration - it’s a diagnostic. Take a breath, scroll up to read the full output, and Google the specific error string. Nine times out of ten, someone has hit the exact same issue and the fix is three commands away.
The habit of reading error messages properly is one of the highest-value skills you can build as a developer on Linux.
3. Rage-Wiping the Install
Something breaks. You’ve been at it for two hours. The temptation to reinstall everything and start fresh is very real.
Resist it. Almost nothing that goes wrong in a fresh Linux install actually requires a reinstall. Package conflicts, broken configs, failed drivers, missing dependencies, all of these have targeted fixes. Wiping and reinstalling is like demolishing your house because a door hinge broke. Find the specific issue, fix it, and move on.
4. Installing Everything from Source
Older tutorials (and some not-so-old ones) will tell you to install software by downloading the source code and compiling it yourself with ./configure && make && make install. Unless you have a specific, technical reason to do this, don’t.
Installing from source means you’re responsible for updates manually, and you risk creating dependency conflicts with packages already managed by apt. Always try sudo apt install [package] first. If it’s not in the repos, try snap or flatpak. Only go to source as a last resort.
5. Chasing the “Perfect” Distro
Arch Linux looks cool. Fedora feels more cutting-edge. Pop!_OS has a beautiful tiling mode. None of that matters when you’re still trying to figure out how to connect to Wi-Fi.
Stay on Ubuntu. Learn the fundamentals - the file system, the terminal, the package manager, the permission model. Once you actually understand Linux, you can make an informed choice about distros. Before that point, switching distros is just tourism that costs you setup time.
6. Forgetting About Dotfiles
Your configuration lives in hidden files called dotfiles which are files in your home directory that start with a ., like .bashrc, .gitconfig, .ssh/config, and .zshrc. These files define your shell behaviour, editor settings, aliases, environment variables, and more.
They’re easy to lose if you ever reinstall. Start backing them up early:
- Create a
dotfilesfolder in your home directory - Copy your config files into it
- Push it to a private GitHub repo
When you need to set up a new machine, you just clone the repo and you’re 80% of the way done in minutes.
7. Skipping System Updates
Running sudo apt update && sudo apt upgrade isn’t just a setup-day thing. Security patches and bug fixes come through regularly. Linux doesn’t auto-update on you (which is the point), but that also means you’re responsible for keeping up.
Build the habit of running this every week or two. It takes two minutes and keeps your system secure.
Where Do You Go From Here?
You’ve made the switch. Your dev environment is set up. You know the common pitfalls. What next?
Linux is a starting point, not a destination. Here’s what the path forward looks like for a developer who wants to get genuinely good.
1. Learn the Terminal Properly
The terminal is the single most powerful tool on your Linux system. Most beginners use it reactively like copy a command, paste it, hope it works. That will only take you so far.
Take time to actually learn it. Start with these:
- Navigation:
cd,ls,pwd,find,locate - File management:
cp,mv,rm,mkdir,touch,ln - Permissions:
chmod,chown, and whatrwxr-xr-xactually means - Text processing:
grep,awk,sed,cat,less,head,tail - Process management:
ps,top,htop,kill,jobs,bg,fg - Networking:
curl,wget,ping,ss,netstat,nmap - Piping and redirection:
|,>,>>,<- chaining commands together
A resource worth working through: The Linux Command Line by William Shotts which is free to read online and one of the best Linux references for beginners.
2. Write Shell Scripts
Once you’re comfortable with the terminal, start automating things. Shell scripting lets you chain commands, automate repetitive tasks, and build tools specific to your own workflow.
Start small with a script that backs up your dotfiles, one that sets up VS Code extensions on a fresh install, one that pulls all your GitHub repos at once. The habit of automating tedious tasks is a genuine developer superpower, and Linux is where it becomes natural. Ready to start? We have a full beginner’s guide to get you going: Bash Scripting for Beginners in 2026: Automate Your Linux Workflow
3. Learn How the System Works
Understanding what’s happening under the hood makes you a significantly better developer:
- The Linux file system hierarchy - what
/etc,/var,/usr,/home,/bin,/lib, and/procare and what lives in them - Processes and services - what
systemdis, how to start/stop/enable services withsystemctl, how to read system logs withjournalctl - Networking basics - how to configure a firewall with
ufw, what ports are, how DNS resolution works on Linux - User and permission management - how users and groups work, how file ownership is structured, why
chmod 755means what it means
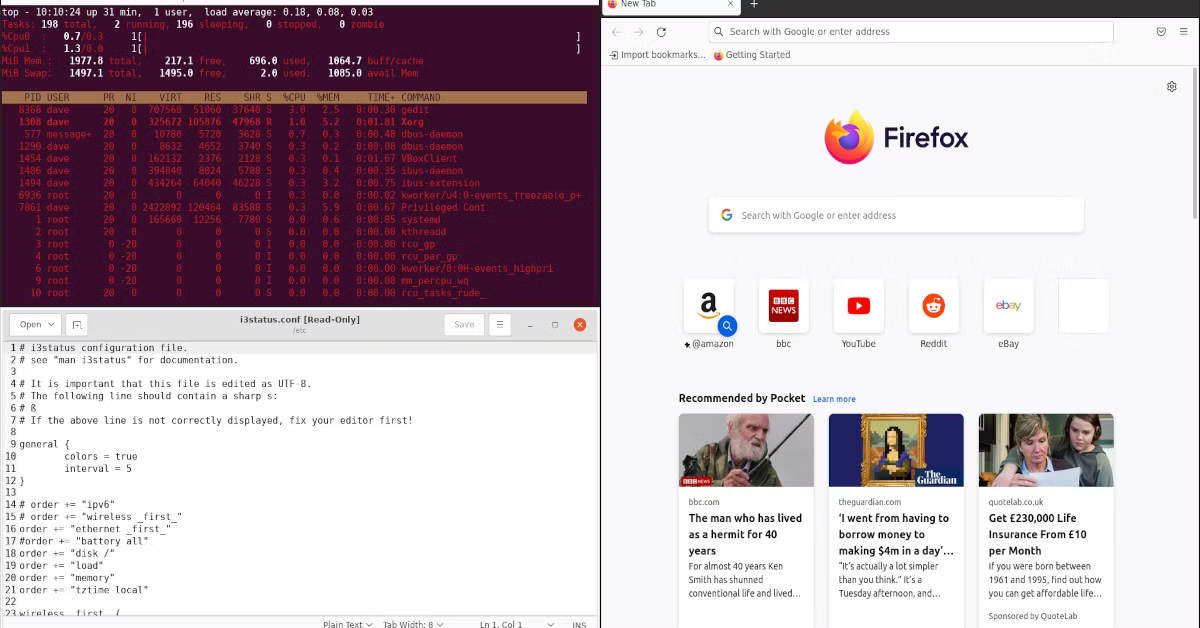
4. Try a Tiling Window Manager
If you want to dramatically speed up your keyboard-driven workflow, try a tiling window manager. Instead of dragging and resizing windows manually, everything tiles automatically meaning no overlaps, no wasted screen real estate, no mouse required for layout.
- i3 - keyboard-driven, well-documented, the most popular starting point
- Sway - like i3 but for Wayland (the display server that Ubuntu 24.04 uses by default)
- bspwm - flexible and scriptable, popular among power users
Fair warning: the initial setup takes time and there’s a learning curve. But once it clicks, going back to dragging windows around feels like moving furniture by hand.
5. Set Up a Home Server or VPS
Linux genuinely shines when you use it to run servers. Get a VPS and start practising real infrastructure skills:
- SSH into a remote machine and manage it entirely from the terminal
- Deploy a web application and serve it over HTTPS
- Configure Nginx or Caddy as a reverse proxy
- Set up and manage a firewall with
ufw - Run Docker containers and write your first
docker-compose.yml
DigitalOcean and Linode (Akamai) both have excellent Linux-specific documentation and beginner-friendly pricing. Their tutorials alone are worth the sign-up.
6. Contribute to Open Source
Linux and everything built around it is open source. The code is readable, forkable, and open for contribution.
Starting points that don’t require deep expertise:
- Fix a typo or improve an explanation in documentation
- Report a reproducible bug with detailed steps and system info
- Find issues labelled
good first issueorhelp wantedin repos you use - Review open pull requests and leave constructive comments
- Eventually: submit a bug fix or a small feature
Good First Issue and GitHub Explore are good starting points for finding beginner-friendly contributions.
7. Plug Into the Community
The community is one of Linux’s greatest strengths. Get plugged in:
- r/linux and r/ubuntu - news, discussion, and help
- Ask Ubuntu - Stack Exchange for Ubuntu-specific questions
- Arch Wiki - the single best Linux documentation resource on the internet, even if you’re not on Arch
- Linux Handbook and It’s FOSS - beginner-friendly articles and tutorials
And of course, if you’ve got questions or hit a wall during your setup, drop them in the community - links in the footer.
The Mindset Shift
There’s something nobody tells you before you switch to Linux: the frustration is the point.
When something breaks and you spend an hour figuring out why by reading error messages, checking logs, trying fixes, reading documentation - you don’t just fix the thing. You understand it. The next time something similar breaks, you fix it in five minutes. The time after that, you spot it before it breaks.
On Windows, the system absorbs your problems. It hides complexity behind dialogs and setup wizards. That’s convenient, but it keeps you dependent. You can use Windows for years without understanding the first thing about how your computer actually works.
Linux doesn’t work like that. When you run a command, it tells you what happened. When something fails, it tells you why. When you configure something, you can see exactly what changed and why it works. There’s no magic, just systems you can learn.
That’s what makes Linux genuinely valuable for developers. Not that it’s objectively superior in every way… even if it is. But it forces an active relationship with your tools. You stop being a passenger in your own machine and start being the one in the driver’s seat.
The learning curve is real. The friction is real. The occasional afternoon lost to a dependency conflict is real. And every one of those experiences makes you sharper.
You made the switch. Now go learn the system. GOOD-LUCK!
Got questions about your setup, or hit a wall somewhere in this guide? Drop them in the comments below or reach out to the community — links in the footer.